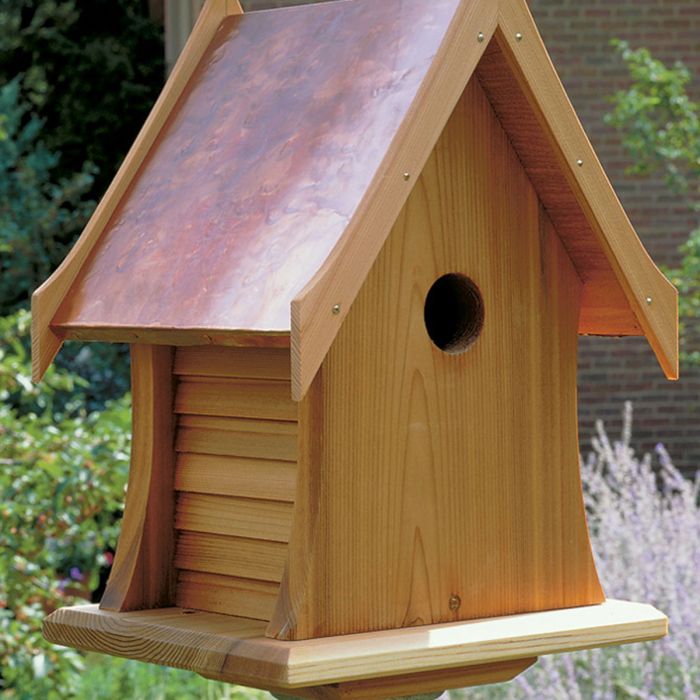
Featured

Running A Woodworking Business

Mastering Your Craft: A Comprehensive Guide to Successfully Running a Woodworking Business

Running A Woodworking Business: Discover essential strategies for launching and thriving in a woodworking business, from crafting a solid business plan to effective marketing and community engagement.

person writing on white paper

Overview of the Woodworking Business Landscape

The woodworking industry encompasses a diverse range of products such as furniture, cabinetry, and custom pieces, appealing to various customer demographics. This diversity allows woodworkers to cater to different markets, from high-end bespoke furniture to affordable, mass-produced items. For many artisans, transitioning from hobbyist to professional requires strategic planning, skill development, and community engagement. Understanding market trends, consumer preferences, and the competitive landscape is essential for staying relevant and successful in this vibrant sector.

For instance, a woodworker who specializes in creating bespoke furniture may find a growing demand for sustainable materials, prompting them to source reclaimed wood to attract eco-conscious customers. By keeping an eye on these trends, woodworkers can adapt their offerings and remain competitive. Additionally, networking within the woodworking community can provide valuable insights into customer preferences and emerging market trends, which can enhance product offerings and overall business strategy.

Importance of a Solid Business Plan

A solid business plan serves as a roadmap for your woodworking venture, outlining long-term goals, strategies for growth, financial projections, and marketing tactics. This document not only guides day-to-day operations but also serves as a crucial tool for attracting investors or securing loans. Regularly revisiting and updating the business plan allows woodworkers to remain agile and responsive to emerging opportunities and challenges.

For example, a woodworking business may start with a focus on custom furniture but later identify a lucrative market for home office furniture as remote work becomes more prevalent. By adjusting the business plan accordingly, the woodworker can capitalize on this trend and ensure sustained growth. Furthermore, seeking feedback from mentors or industry peers can provide invaluable insights that help refine strategies and identify areas for improvement, ultimately leading to a more robust business framework.

Essential Tools and Equipment

Investing in high-quality tools and equipment is crucial for enhancing craftsmanship and efficiency, which ultimately leads to better product quality. Essential tools include saws, drills, sanders, and safety gear like goggles and ear protection. Comfort and ergonomics should also be considered when selecting tools, as they can impact productivity and the quality of work. Regular maintenance of these tools extends their lifespan and helps prevent costly repairs.

A practical example of this is a woodworker who purchases a premium table saw; they may find that it not only improves the quality of their cuts but also reduces the time spent on projects, allowing them to take on more orders and increase revenue. Safety gear is equally important; it ensures a safe working environment, minimizing the risk of injuries that could disrupt production. Additionally, investing in proper storage solutions for tools and materials can help maintain an organized workspace, fostering efficiency and creativity.

Marketing Strategies

Effective marketing strategies are vital for attracting customers to your woodworking business. Email marketing campaigns can reach potential customers and keep existing clients informed about new products and promotions. Social media platforms, particularly visual-heavy sites like Instagram and Pinterest, can showcase completed projects and connect with audiences. Attending industry trade shows and local craft events offers valuable networking opportunities and exposure to potential buyers.

For instance, a woodworker could showcase their unique handcrafted pieces at a local craft fair, gaining immediate feedback and building relationships with customers. Utilizing customer testimonials and case studies in marketing materials can further enhance credibility and trust, persuading prospective clients to choose your services over competitors. Additionally, creating a visually appealing website that displays a portfolio of work and provides easy navigation for customers can significantly enhance online visibility and attract more clients.

Pricing Strategies

Determining the right pricing for woodworking products and services requires careful consideration. Conducting competitor analysis helps identify market rates, ensuring prices remain competitive while still covering costs. Offering tiered pricing options allows customers to choose products based on their budget, which can increase sales potential.

For example, a woodworker might offer a basic version of a custom piece alongside premium options that incorporate higher-quality materials or intricate designs. Seasonal promotions and discounts can also drive sales during slower periods, helping attract new customers while retaining existing ones. It’s also beneficial to consider the costs of materials, labor, and overhead when setting prices to ensure sustainability and profitability in the long run. Developing a clear pricing strategy that reflects the quality of craftsmanship and uniqueness of the products can help establish a strong market position.

Overcoming Common Challenges

Starting and running a woodworking business comes with its set of challenges. Time management skills are critical to balance woodworking tasks with marketing and administrative duties. Establishing a support network, including other woodworkers and business owners, can provide assistance and encouragement in navigating industry challenges.

One common issue is managing supply chain disruptions, especially when sourcing specific materials. Developing a contingency plan, such as identifying alternative suppliers or keeping a small inventory of essential materials, can help ensure business continuity during unexpected challenges. Furthermore, staying informed about industry trends and economic changes can help woodworkers anticipate potential challenges before they arise. By fostering resilience and adaptability, woodworking businesses can better navigate the uncertainties of the market.

Exploring Niche Markets

Exploring niche markets can significantly enhance a woodworking business’s appeal. Researching emerging trends, such as sustainable woodworking practices, enables woodworkers to tap into environmentally conscious consumer segments. Customization options for products further cater to specific customer needs, enhancing the attractiveness of woodworking offerings.

For instance, a woodworker could collaborate with local businesses to create unique products that reflect community values, such as furniture made from locally sourced materials. Engaging with these niche markets can lead to new opportunities and a loyal customer base. Additionally, focusing on specific demographics, such as young professionals seeking modern furniture or parents looking for child-safe products, can help tailor marketing efforts and product designs to meet unique needs.

Legal Requirements and Structures

Navigating the legal landscape is crucial when starting a woodworking business. Understanding different business structures, such as sole proprietorships, partnerships, and LLCs, helps in choosing the right one for liability protection and tax implications. Business licenses and permits may vary significantly by location, necessitating thorough research to ensure compliance.

For example, a woodworker might choose to form an LLC to protect personal assets from business liabilities. Regularly consulting with legal and financial advisors can help manage the complexities of running a woodworking business and ensure adherence to local regulations. It is also essential to stay informed about zoning laws that could impact where and how you operate your business, especially if working from home or in a commercial space.

The Potential for Online Sales

Building an online presence is increasingly important for woodworking businesses. An e-commerce website allows for greater control over branding and customer experience compared to third-party platforms. Utilizing SEO strategies can enhance online visibility, driving more traffic to your woodworking business site.

A practical example would be a woodworker creating a blog section on their site, sharing tips and project ideas. This not only positions them as an industry expert but also drives organic traffic, leading to potential sales conversions. Additionally, engaging with customers through newsletters and social media can foster a sense of community and keep your audience informed about new products, sales, or woodworking tips.

Success Stories and Community Engagement

Community engagement can play a pivotal role in the success of a woodworking business. Participation in local workshops and educational programs fosters goodwill, attracting new customers while enhancing visibility. Collaborating with local schools or organizations to offer woodworking classes can also create unique opportunities for outreach and skill development.

For instance, sharing success stories through social media and local media outlets can inspire others and promote the woodworking business, creating a strong community connection that benefits all involved. Engaging with community initiatives, such as crafting furniture for local non-profits or hosting charity events, can not only enhance your brand image but also build a loyal customer base that values community involvement.

Recap of Key Strategies for Running a Woodworking Business

To successfully run a woodworking business, it’s essential to adopt a well-rounded approach encompassing strategic planning, effective marketing, and community involvement. Aspiring woodworkers should leverage their skills, creativity, and the support of their communities to build thriving enterprises. Understanding the intricacies of the woodworking business landscape, staying adaptable, and being proactive in addressing challenges will ultimately lead to success in their craft. Each step taken in planning, marketing, and community engagement can significantly impact the growth and sustainability of a woodworking business.
Featured

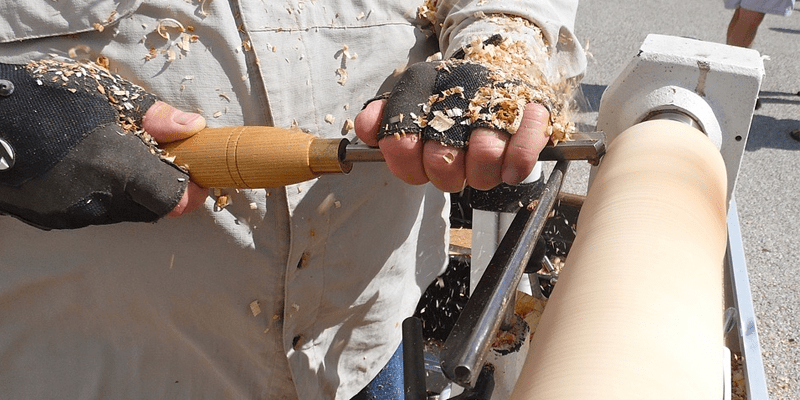
Woodworking Machinery

The ability of these devices was reduced as well as it took a lengthy time and also initiative for making a solitary item of furnishings. Today we have the choice of making use of woodworking equipment. This equipment has an electric motor, which functions on power or oil.

Several of the typical woodworking equipment is table saw, planer, piercing maker as well as pin molder. There is a great deal of selection readily available for the dimension as well as ability of these devices. They can be chosen according to the work for which we wish to utilize them.

The ones, which are installed on the table, have a great grove to on one side of the blade. In enhancement, a fencing, which overviews the timber for reducing, is affixed to the very same side. This maker is beneficial for offering cuts in parallel to the sides of the wood item.

On the various other hand, the gliding table saw slides over the table on which it is installed. We can reduce a wood item positioned it. It is extremely widely made use of for reducing level panels of timber.

Planer jointer is woodworking equipment made use of for smoothing and also squashing of the job item. It has blades that turn in the straight instructions. It likewise has leading fencing, which will certainly help with to provide the job item, a 90-degree cut.

Thicknesser is made use of for reducing the timber to offer it a consistent density. This can be done by smoothening of the timber item with its assistance. It is not beneficial for making the job item level.

Fixed drill press as the name recommends is an exploration device. The fixed exploration devices help with to make openings that are extra exact.

Pin molder is the equipment utilized for bigger work. It is durable equipment. If it is integrated with the feeding device, it will certainly be one of the most helpful woodworking equipment.

Band saw is one more kind of woodworking equipment. The round cuts, which are to be so exact, can be done with simplicity utilizing this equipment. It has a ‘cross can reduce bar’ as well, which permits cross cuts.

These are a few of the woodworking equipment readily available nowadays. Consistent renovations are happening as well as for this reason the capabilities, in addition to the functions of these equipments, are enhancing.

Today we have the alternative of making use of woodworking equipment. Some of the usual woodworking equipment is table saw, planer, piercing device as well as pin molder. Planer jointer is woodworking equipment utilized for smoothing as well as squashing of the job item. If it is integrated with the feeding equipment, it will certainly be one of the most valuable woodworking equipment.

Band saw is an additional kind of woodworking equipment.

How to Sharpen a Whittling Knife: Strop and Whetstone Guide for Beginners

How to Sharpen a Whittling Knife: Strop and Whetstone Guide for Beginners

By Les Blackbourne · Updated October 2026

To sharpen a whittling knife, strop it on a leather strop loaded with polishing compound before every carving session, pulling the blade backwards, spine first, with the bevel lying flat on the leather. Stropping takes about a minute and keeps a good edge razor sharp. Use a whetstone only when stropping no longer brings the edge back, for example after you chip the blade or let it go very dull.

Most whittling knives, including popular beginner kits such as the BeaverCraft S15, arrive sharp and come with a strop. So for most beginners, learning to strop is all the sharpening you need.

Affiliate disclosure: This article contains Amazon affiliate links. As an Amazon Associate I earn from qualifying purchases, at no extra cost to you.

Part of our beginner whittling series: Best whittling kits for beginners · 7 easy whittling projects

Stropping vs sharpening: what is the difference?

StroppingSharpening (whetstone)
What it doesPolishes and realigns an edge that is already sharpRemoves steel to create a new edge
When to do itBefore every session, and during long sessionsOnly when stropping stops working, or after damage
TimeAbout 1 minute10–20 minutes
ToolsLeather strop and polishing compoundWhetstone (medium and fine grit), water or oil
Beginner difficultyEasyTakes practice

How to tell if your whittling knife is blunt

  • The paper test: a sharp knife slices cleanly through the edge of a sheet of printer paper. A blunt one tears or snags.
  • The end-grain test: a sharp knife leaves a shiny, smooth surface when it cuts across the end of a basswood block. A blunt one crushes the fibres and leaves a fuzzy, dull cut.
  • The feel test: if you are pushing harder than usual, or the blade skids rather than biting, it is time to strop.
Why this matters: a blunt knife is more dangerous than a sharp one. It needs more force, and more force means a bigger slip when it goes wrong.

How to strop a whittling knife (step by step)

What you need

Steps

  1. Load the strop. Rub the compound bar onto the smooth side of the leather, like colouring with a crayon, until there is a thin, even layer. You only need to reload every few sessions.
  2. Lay the bevel flat. Place the knife on the strop with the edge facing towards you and the bevel (the angled, sharpened face) lying flat on the leather. Most carving knives have a single flat bevel, so you can feel when it is flat.
  3. Pull, spine first. Draw the blade away from the edge, so the spine leads and the edge trails behind. Never push the edge forward into the leather, or it will cut the strop and round the edge.
  4. Use light pressure. Let the weight of your hand do the work. Heavy pressure makes the leather wrap round the edge and rounds it over.
  5. Alternate sides. Do 10–15 strokes on one side, then the same number on the other side.
  6. Test. Make a cut across the end grain of a basswood block. If it is shiny and smooth, you are ready to carve.

Tip: strop for a few strokes every 20–30 minutes during a long session. Little and often keeps the edge far longer than an occasional big sharpening.

How to sharpen a whittling knife on a whetstone

You only need a whetstone when stropping no longer restores the edge, for example when the blade has a small chip, has been dropped, or has gone dull through months of use without stropping.

What you need

  • A combination whetstone with a medium grit (around 1000) and a fine grit (around 4000–6000). See combination whetstones
  • Water or honing oil, depending on the stone (check the instructions).
  • A marker pen (optional, but very helpful for beginners).

Steps

  1. Prepare the stone. Soak or wet a water stone as its instructions say, and set it on a non-slip surface.
  2. Colour the bevel. Run a marker along the bevel. As you sharpen, the ink will show whether you are holding the bevel flat. If ink stays at the edge or the back, adjust your angle.
  3. Start on the medium grit. Lay the bevel flat on the stone and push the blade forward, edge leading, in smooth strokes along the length of the stone. Work along the whole edge.
  4. Feel for a burr. After several strokes, gently run your thumb across (never along) the opposite side of the edge. A tiny rough lip, the burr, means you have sharpened right to the edge.
  5. Repeat on the other side, using the same number of strokes.
  6. Refine on the fine grit. Repeat with lighter pressure and fewer strokes per side.
  7. Finish on the strop. Strop as above to remove the burr and polish the edge.
Keep the factory angle. Carving knives are ground with a flat bevel at a set angle (for example, BeaverCraft’s S15X knives use a 20-degree bevel). Following the existing bevel flat, rather than adding a new steeper angle, keeps the knife cutting the way it was designed to.

Common sharpening mistakes beginners make

  • Pushing the edge into the strop. Always strop with the edge trailing.
  • Pressing too hard. Heavy pressure rounds the edge over. Lighter is better.
  • Rocking the knife. Changing the angle mid-stroke creates a rounded edge. Keep the bevel flat throughout.
  • Using a pull-through kitchen sharpener. These are designed for kitchen knives with a different edge shape and can ruin the flat bevel of a carving knife.
  • Waiting until the knife is very dull. Regular stropping saves you from ever needing a full re-sharpen.

Recommended sharpening kit for whittlers

  • Already bought a starter kit? Many beginner kits, including the BeaverCraft S15 and S15X, include a strop and compound, so you may already have everything you need for stropping. See our best whittling kits for beginners guide.
  • Bought a budget kit with no strop? A paddle strop and a bar of compound is the most useful upgrade you can make. See paddle strops with compound
  • Keen to keep carving for years? Add a combination whetstone for occasional repairs.

Frequently asked questions

How do you sharpen a whittling knife?

Strop it on a leather strop loaded with polishing compound, pulling the blade spine first with the bevel flat on the leather, for 10 to 15 strokes per side. Use a whetstone only if stropping no longer restores the edge.

How often should I strop my whittling knife?

Strop before every carving session and for a few strokes every 20 to 30 minutes during long sessions. Regular stropping keeps the edge sharp so you rarely need a whetstone.

What angle should a whittling knife be sharpened at?

Follow the knife’s existing bevel and keep it flat against the strop or stone. Many carving knives use a single flat bevel of around 20 degrees, such as BeaverCraft’s S15X knives.

Can I use a kitchen knife sharpener on a whittling knife?

It is best not to. Pull-through kitchen sharpeners are designed for kitchen knives and can damage the flat bevel of a carving knife. Use a leather strop and, when needed, a whetstone instead.

What can I use if I do not have a strop?

A piece of thick leather glued smooth side up to a flat piece of wood, loaded with polishing compound, works as a homemade strop. Even the back of an old leather belt on a flat board will do in a pinch.

The bottom line

Strop little and often, keep the bevel flat, and let the strop do the work. That one-minute habit is the difference between a knife that fights you and one that glides through the wood. Once your knife is sharp, pick a first piece from our easy whittling projects for beginners.

See leather strops on Amazon UK

Scheppach DP60 Bench Pillar Drill Review.

Scheppach DP60 Bench Pillar Drill Review. The Scheppach DP60 is a 710W benchtop drill press with a two-speed gearbox (170–2600 rpm), a digital depth and speed display, a built-in laser guide, LED work light, and a keyless 13mm chuck. It’s aimed at hobbyists and home workshops rather than industrial use, drills up to 40mm in wood and 13mm in steel, and typically sells in the UK for well under £200 — making it one of the more affordable digital-display bench drills on the market. It’s a strong pick if you want more accuracy than a handheld drill without paying for a professional-grade machine.

Man using a bench drill press in a home workshop

What Is the Scheppach DP60?

The DP60 is a benchtop pillar (drill press) machine from Scheppach, a German-founded brand that’s been producing woodworking machinery since 1927. Unlike a handheld drill, the DP60 mounts the drill vertically over a fixed table, so the workpiece stays still and the drill moves down onto it — giving far more consistent, square, repeatable holes than freehand drilling ever can.

It sits in the budget-to-mid tier of benchtop drills: not a toy, but not a heavy-duty industrial machine either. If you’ve outgrown a hand drill for jobs like dowel holes, shelf-pin rows, or repeat drilling in batches of parts, this is the natural next tool — and pairs well with the joinery covered in our basic woodworking joints for beginners guide.

Key Features

  • 710W motor, two-speed gearbox: 170–880 rpm in first gear for high torque on harder materials, 490–2600 rpm in second gear for fast, clean cuts in wood and plastic
  • Digital display: Shows spindle speed and drilling depth, so repeat holes come out consistent without measuring each one by hand
  • Laser guide and LED light: The laser marks your drilling centre point before you switch the motor on; the LED lights the work area, useful in a dim shed or garage
  • Keyless 13mm chuck: Swap bits without hunting for a chuck key — a small thing that saves real time over a session
  • 100mm drilling stroke, 280mm chuck-to-base clearance: Enough range for most benchtop jobs, including taller workpieces
  • 350 x 300mm base plate: Wide enough to bolt down securely, which matters more than people expect once you’re leaning on the handle
  • Quick-action clamp: Secures flat or round workpieces so they can’t spin or shift mid-drill

Specifications

SpecDetail
Motor710W, 230V
Speed range170–2600 rpm (2-speed gearbox)
Chuck capacity1.5–13mm, keyless
Max drilling depthWood: 40mm · Steel: 13mm
Drilling stroke100mm
Base plate350 x 300mm
ExtrasDigital display, laser guide, LED light, quick-action clamp

What Users Say

Owner feedback online is consistent: the DP60 is well liked as an affordable, straightforward machine for hobby and home-shop use, with the digital display and two-speed gearbox called out as genuinely useful rather than gimmicky. The most common criticism is the laser guide — several users note it’s factory-set and can’t be recalibrated, so it’s good for a rough centre-mark but not for fine precision drilling. Worth knowing before you rely on it for tight-tolerance work.

It’s also worth knowing the DP60 shares its core design with rebadged versions sold under other budget brands (Parkside/Lidl being the most commonly mentioned), which is normal in this end of the tool market and not a red flag on its own — it just means the DP60’s reputation is shared with those siblings.

Pros and Cons

ProsCons
Digital speed and depth display for repeatable results
Two-speed gearbox covers wood, plastic, and light steel
Keyless chuck speeds up bit changes
Genuinely affordable for a digital-display bench drill
LED light helps in poorly-lit workshops
Laser guide can’t be recalibrated once it drifts
Not built for heavy industrial or all-day commercial use
Some reports of budget-tier fit and finish on moving parts
13mm max in steel limits it for serious metalwork

Who It’s For

The DP60 makes sense for home woodworkers and DIYers who need more accuracy than a handheld drill for jobs like shelf-pin holes, dowel joints, and repeat drilling — the kind of precision that matters if you’re following our guide to basic woodworking joints and want clean, square holes for dowels or hardware. It’s not the machine for a busy trade workshop drilling steel all day — for that, step up to a heavier industrial press. For a garage, shed, or spare-room workshop, it’s a sensible, well-specced choice at the price.

Check Current Price on Amazon UK →

Final Thoughts

The Scheppach DP60 does what a home-workshop bench drill needs to do: it turns hand-drilled guesswork into repeatable, square, consistent holes, with a digital display and two-speed gearbox that punch above the price point. The laser’s lack of recalibration is a fair criticism, but it’s a minor one if you treat it as a rough guide rather than a precision instrument. For hobbyist woodworkers and DIYers upgrading from a handheld drill, it’s a solid, sensibly priced choice.

As always, check current pricing and stock on the Amazon listing above before buying, since prices on tools like this can shift with promotions.

7 Easy Whittling Projects for Beginners (Step by Step)

7 Easy Whittling Projects for Beginners (Step by Step)

By Les Blackbourne · Updated October 2026

The easiest whittling project for beginners is a simple wooden butter spreader. It is a flat, gently curved shape that teaches the two cuts every carver needs, the push cut and the pull cut, and you can finish one in an afternoon with a single knife and a block of basswood. Once you can make a spreader, move on to a spoon, a small bird and then a wood spirit face.

Below are seven beginner whittling projects in order of difficulty, each with the tools, time and steps you need.

Affiliate disclosure: This article contains Amazon affiliate links. As an Amazon Associate I earn from qualifying purchases, at no extra cost to you.

Need tools first? See our guide to the best whittling kits for beginners, which compares three starter kits for every budget.

Projects at a glance

ProjectDifficultyTimeMain skill learned
Butter spreaderVery easy2–3 hoursPush and pull cuts
Simple wooden spoonEasy3–5 hoursCarving curves and hollows
Walking stick handleEasy1–2 hoursStop cuts and patterns
Small birdEasy–moderate3–4 hoursRounding a 3D shape
Chip-carved coasterModerate2–3 hoursChip carving triangles
Garden gnomeModerate3–5 hoursSimple figure carving
Wood spirit faceModerate4–6 hoursFacial features and detail

Times are rough guides for a first attempt and will shorten as you practise.

Before you start: the two cuts you need

The push cut: hold the knife in your carving hand and use the thumb of your other hand to push the back of the blade forward, away from you. This gives small, controlled cuts.

The pull cut (paring cut): brace the thumb of your carving hand on the wood and draw the blade towards that thumb, much like peeling an apple. Wear a leather thumb guard for this one.

Always wear a cut-resistant glove on the hand holding the wood, and keep your knife sharp. A blunt blade needs more force and is more likely to slip.

The 7 projects

1. Butter spreader

Very easyOne knife2–3 hours
  1. Draw a spreader outline (about 15 cm long) on a thin basswood blank, with the grain running along its length.
  2. Remove the waste wood outside the outline using push cuts.
  3. Thin the blade end gradually from both sides until it is about 3 mm thick at the edge.
  4. Round over the handle so it sits comfortably in your hand.
  5. Smooth with fine sandpaper and finish with food-safe oil.

Tip: if the wood starts to tear, turn the piece round and cut from the other direction. You are cutting against the grain.

2. Simple wooden spoon

EasyKnife + hook knife3–5 hours
  1. Draw the spoon outline from above and from the side on your blank.
  2. Rough out the shape with your roughing knife, leaving the bowl area thick.
  3. Hollow the bowl with a hook knife, working from the edges towards the centre.
  4. Thin the handle and the back of the bowl to match.
  5. Sand and oil with a food-safe finish.

Tip: a hook knife makes the bowl far easier. See spoon carving hook knives

3. Walking stick handle

EasyOne knife1–2 hours
  1. Choose a straight stick or a length of dowel.
  2. Mark a band or spiral pattern near the top with a pencil.
  3. Make a straight stop cut along each pencil line.
  4. Angle in from the side to remove a small chip up to the stop cut.
  5. Repeat around the stick, then smooth the grip area.

Tip: this is the best project for learning stop cuts, which you will use in almost every carving afterwards.

4. Small bird

Easy–moderateRoughing + detail knife3–4 hours
  1. Trace a side-view bird pattern onto a basswood block about 8 cm long.
  2. Cut away the waste around the outline to get a flat silhouette.
  3. Draw a centre line along the top and round the body towards it from both sides.
  4. Shape the head, beak and tail, then define the wings with shallow stop cuts.
  5. Add eyes with the tip of your detail knife, then sand lightly.

Tip: keep the beak and tail thick until the very end. Thin parts snap easily.

5. Chip-carved coaster

ModerateChip carving knife2–3 hours
  1. Sand a flat square or round basswood blank smooth.
  2. Draw a grid of triangles in pencil around the edge.
  3. Make three angled cuts per triangle, each meeting at the deepest point in the centre.
  4. Lift out each chip cleanly in one piece.
  5. Erase the pencil lines and seal with a clear finish.

Tip: keep the knife at the same angle for every cut and the pattern will look crisp and even.

6. Garden gnome

ModerateRoughing + detail knife3–5 hours
  1. Start with a square stick of basswood about 2.5 cm wide and 10 cm tall.
  2. Carve one corner to form the front of the hat, and round off the top to a point.
  3. Mark the hat brim and make a stop cut all the way round.
  4. Carve the nose as a small bump under the brim, then shape the beard below it.
  5. Round the body and add simple arms or a belt line.

Tip: gnomes look great painted. Thin acrylics let the wood grain show through.

7. Wood spirit face

ModerateDetail knife4–6 hours
  1. Use a branch or basswood block and mark where the eyes, nose and mouth will go.
  2. Carve a deep notch for the brow line, then shape the nose below it.
  3. Cut the eye sockets and add simple almond-shaped eyes.
  4. Carve the mouth and cheeks, then add flowing lines for hair and beard.
  5. Finish with oil or leave the wood natural.

Tip: carving on a natural stick with its bark left on gives a rustic look that hides small mistakes.

What you need for these projects

Frequently asked questions

What is the easiest thing to whittle for a beginner?

A butter spreader is the easiest whittling project for beginners. It is a flat shape that needs only one knife, teaches the push and pull cuts, and can be finished in two to three hours.

What should I whittle first?

Start with a butter spreader or a walking stick pattern to learn basic cuts, then move on to a spoon and a small bird. Leave faces such as wood spirits until you are comfortable with a detail knife.

What wood is easiest to whittle?

Basswood, sold as lime wood in the UK, is the easiest wood to whittle. It is soft, has very little grain pattern and holds fine detail without splitting.

Can I whittle with a pocket knife?

Yes, a sharp pocket knife can handle simple projects such as a spreader or a walking stick. A dedicated carving knife gives more control for detailed projects like birds and faces.

How do I stop wood from splitting when whittling?

Take thin cuts and carve with the grain, not against it. If the wood starts to tear or split, turn the piece round and cut from the opposite direction.

Ready to start?

Pick project 1, grab a block of basswood and give yourself an afternoon. If you have not chosen your tools yet, start with our best whittling kits for beginners guide.

See the best beginner whittling kits

10 Beginner Woodworking Projects

10 Beginner Woodworking Projects You Can Finish in a Weekend

10 Beginner Woodworking Projects. Getting started with woodworking doesn’t mean you need a full workshop, years of experience, or endless free time. In fact, some of the most satisfying woodworking projects are small, practical builds you can complete in a single weekend.

If you’re new, you may want to start with our complete guide to essential woodworking tools for beginners before diving into your first build.


1. Simple Wooden Shelf


A basic wooden shelf is one of the best starter projects. You’ll practice measuring, cutting straight lines, drilling pilot holes, and mounting hardware.

For tool recommendations, see our guide on woodworking measuring tools every beginner should own.

  • Skills learned: measuring, level installation, fastening

2. Rustic Coffee Table

Rustic coffee table beginner woodworking project

A rustic coffee table introduces you to frame construction and basic joinery. Using construction lumber or reclaimed wood keeps costs low.

If you want detailed plans, check out our beginner furniture woodworking projects guide.

  • Skills learned: frame assembly, sanding, finishing

3. Wooden Birdhouse


Birdhouses are classic beginner projects and perfect for scrap wood.

Learn more about safe materials in our article on choosing the best wood for beginner projects.

  • Skills learned: angled cuts, small assembly

4. Storage Crate or Box

Wooden storage crate DIY beginner woodworking project

A wooden storage crate helps you master square corners and clean assembly.

For joinery tips, see basic woodworking joints explained for beginners.

  • Skills learned: box construction, squaring joints

5. Small Side Table

Small side table beginner woodworking project

Side tables are confidence-building projects that look impressive but remain beginner-friendly.

You’ll want clamps for this build — here’s our review of the best woodworking clamps for beginners.

  • Skills learned: leg alignment, tabletop attachment

6. Wooden Planter Box

Wooden planter box beginner woodworking project

Planter boxes are forgiving outdoor projects and perfect for learning fast assembly.

See our full guide on outdoor woodworking projects for beginners for more ideas.

  • Skills learned: exterior assembly, weatherproofing

7. Bench-Top Tool Organizer

Workbench tool organizer beginner woodworking project

A bench-top organizer keeps your tools accessible and saves time on every future project.

Pair this with our woodworking workshop organization tips.

  • Skills learned: layout planning, compartment sizing

8. Wooden Picture Frame

Wooden picture frame beginner woodworking project

Picture frames teach precision cuts and tight-fitting joints.

For cutting accuracy, read our guide on how to make accurate miter cuts.

  • Skills learned: miter cuts, precision fitting

9. Simple Workbench

Simple DIY workbench beginner woodworking project

A sturdy workbench is the foundation of every woodworking shop.

We break this down step by step in our beginner DIY workbench plans.

  • Skills learned: structural framing, leveling

10. Scrap Wood Projects

Scrap wood projects for beginner woodworking

Scrap wood projects let you practice without pressure or waste.

Browse more ideas in our scrap wood woodworking projects guide.

  • Skills learned: creativity, problem-solving

Final Thoughts

These beginner woodworking projects are designed to build confidence fast while producing real, usable results. Each project prepares you for more advanced builds as your skills grow.

For a structured learning path, explore our main hub:
Beginner Woodworking Projects – Complete Starter Guide

A Guide to Cutting Finger Joints

A Guide to Cutting Finger Joints

A Guide to Cutting Finger Joints. Finger joints, also known as box joints, are a classic woodworking joint known for their strength, clean appearance, and versatility. They are commonly used in boxes, drawers, cabinets, and furniture corners where both durability and visual appeal matter.

A Guide to Cutting Finger Joints

In this guide to cutting finger joints, you’ll learn what finger joints are, why they’re useful, the tools required, and step-by-step methods to cut them accurately—even in a home workshop.

What Are Finger Joints?

Finger joints consist of evenly spaced rectangular “fingers” cut into the ends of two boards. When interlocked and glued together, these fingers create a strong mechanical bond with a large surface area for glue.

Unlike butt joints, finger joints resist pulling apart and twisting, making them ideal for projects that need strength without visible fasteners.

Why Use Finger Joints in Woodworking?

Finger joints are popular for several reasons. First, they are extremely strong due to the increased glue surface. Second, they are visually attractive, especially when cut cleanly and aligned precisely. Finally, they are versatile and work well with many types of wood.

Finger joints are commonly used for:

  • Wooden boxes and storage crates
  • Drawer construction
  • Small cabinets
  • Decorative furniture corners

For beginners looking to move beyond basic joints, finger joints are an excellent next step.

Tools Needed to Cut Finger Joints

You don’t need an advanced workshop to cut finger joints, but accuracy is essential. Common tools include:

  • Table saw or router
  • Finger joint jig (shop-made or commercial)
  • Clamps
  • Measuring tools and square
  • Wood glue

A jig is the most important component. It ensures consistent spacing and prevents errors that can ruin the joint.

Method 1: Cutting Finger Joints with a Table Saw

Using a table saw with a finger joint jig is one of the most popular methods.

Step 1: Set up a dado blade or standard blade depending on finger width. The blade width determines the size of each finger.

Step 2: Attach the jig to the miter gauge and align the indexing pin with the blade.

Step 3: Make the first cut, then slide the board over the indexing pin to position the next cut.

Step 4: Repeat the process until the entire edge is cut.

Repeat the same process for the mating board, ensuring proper alignment so the fingers interlock cleanly.

Method 2: Cutting Finger Joints with a Router

A router table fitted with a straight bit can also be used to cut finger joints. This method is quieter and often preferred for smaller projects.

Step 1: Install a straight router bit sized to match the desired finger width.

Step 2: Use a finger joint jig or router fence with an indexing pin.

Step 3: Make shallow passes to avoid tear-out and maintain control.

This method provides excellent results when done carefully.

Tips for Perfect Finger Joints

Accuracy is the key to clean finger joints. Always test your setup on scrap wood before cutting final pieces.

  • Use sharp blades and bits
  • Double-check measurements
  • Clamp workpieces securely
  • Sand lightly after assembly

If joints are too tight, lightly sand the fingers. If too loose, adjust the jig spacing and recut.

Gluing and Assembling Finger Joints

Apply glue evenly to all mating surfaces. Assemble the joint carefully and use clamps to apply even pressure. Avoid over-tightening, which can squeeze out too much glue.

Wipe away excess glue before it dries to maintain a clean appearance.

A Guide to Cutting Finger Joints

Final Thoughts

Finger joints combine strength, precision, and visual appeal, making them one of the most rewarding joints to learn. While they require patience and accuracy, the results are well worth the effort.

If you’re building your skills and want a structured learning path, explore our complete beginner resource: Home Woodworking for Beginners.

You cannot copy content of this page